
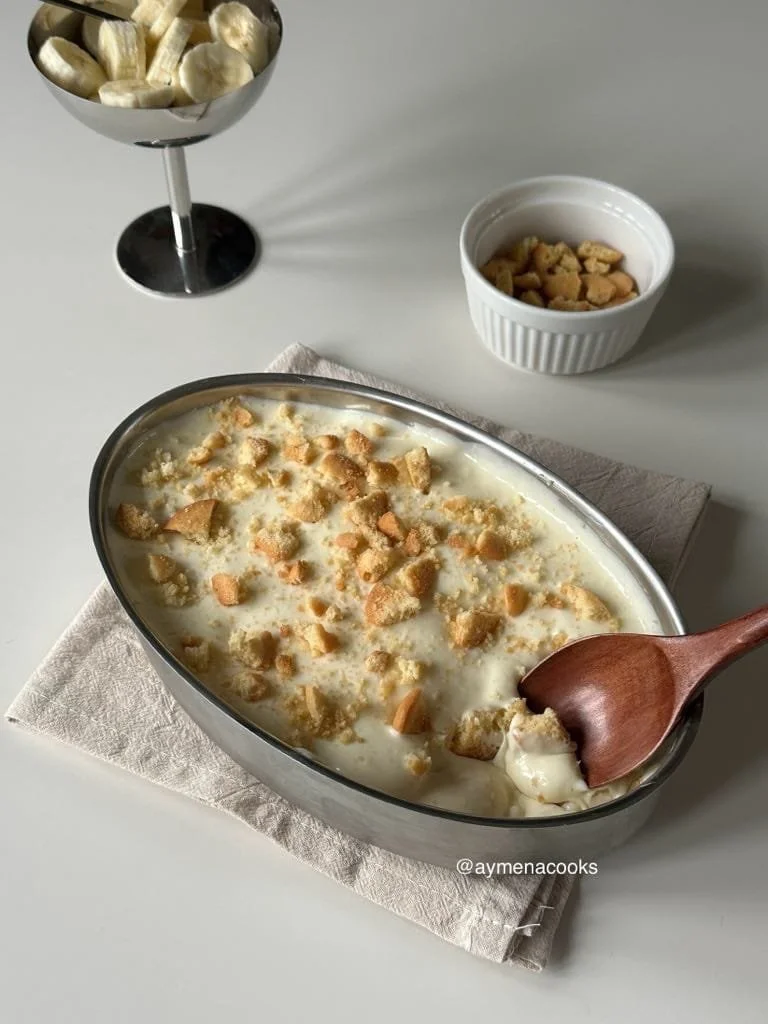

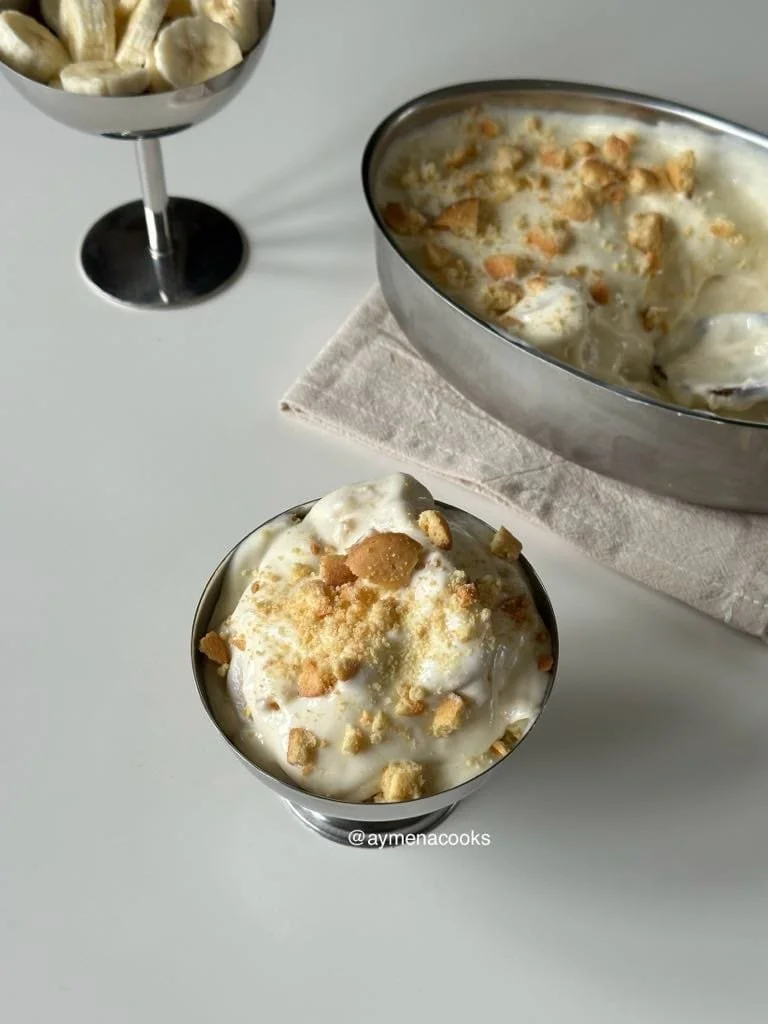
this homemade banana pudding is made entirely from scratch with a silky homemade custard folded through freshly whipped cream and sandwiched between layers of perfectly ripe banana slices and crisp vanilla wafers ⊹ ࣪ ˖
why you will love this quick and easy homemade banana pudding recipe
-
completely homemade – this homemade banana pudding recipe uses a homemade custard, which i personally think is way nicer than using boxed pudding mix! this recipe also uses vanilla wafers made from scratch, which are actually very easy to make. yes, there is a little bit of effort and patience involved but i would say that it’s definitely worth it!
-
simple ingredients – this homemade banana pudding uses very simple, basic ingredients that you probably already have at home.
-
can be made ahead of time – this homemade banana pudding is perfect for gatherings and is pretty easy to prep and make in advance!
learn how to make this homemade banana pudding from scratch
to make this easy banana pudding dessert, we’re going to start off by making the homemade banana pudding custard. mix together egg yolks, sugar and cornstarch. add milk and cook the mixture over low-medium heat until it thickens up into a custard. add butter, vanilla extract and salt, and mix this in, then transfer the custard to another bowl. add condensed milk to the custard and mix it in, then let this mixture cool completely in the fridge.
once the custard is completely cool, whip heavy cream until soft and then whip the custard and cream together until combined and you have a creamy pudding-like mixture.
to assemble this homemade banana pudding dessert, we’ll layer the cream with fresh bananas and nilla wafers (either store-bought or homemade, it’s up to you!) in a dish. repeat each layer until you reach the top of the dish, then top with crumbled up vanilla wafers. place the assembled banana pudding in the fridge overnight.
then just serve the next day, and we’re done!
homemade banana pudding ingredients:
-
egg yolks -i make this homemade banana pudding with egg yolks for the custard.
-
granulated sugar – this quick homemade banana pudding mixes granulated sugar and egg yolks together when making the custard.
-
cornstarch – i make this homemade banana pudding using cornstarch in order to thicken up the custard.
-
milk – this homemade banana vanilla pudding uses whole milk or full fat milk to make the custard for the pudding layer.
-
butter – we’re going to be adding butter to the homemade vanilla pudding at the end to give it some shine and richness. i’m using unsalted butter here but you can use whatever you like.
-
vanilla extract – this homemade banana pudding recipe uses just a small amount of vanilla extract in the custard and when whipping the cream for a subtle vanilla flavour.
-
salt – i like to add a pinch of salt to the custard at the end alongside using salted butter in order to balance out the sweetness.
-
condensed milk – i make this homemade banana pudding using condensed milk to help add sweetness and richness to the custard.
-
double cream/heavy cream – i make this homemade banana pudding with homemade whipped cream as it helps lighten the custard and adds an airy layer to this banana pudding – whip some fresh double cream or heavy cream and mix it into the cold custard to make the filling.
-
icing sugar or powdered sugar – just a small amount of this will be used to add some sweetness to the whipped cream.
-
bananas – i’m making this homemade banana pudding using bananas that are sweet but still firm and not overly ripe. if the bananas are too ripe, they will turn mushy in the pudding.
-
vanilla wafers – i’m making this homemade banana pudding with vanilla wafers that have been made at home, but you can also just store-bought vanilla wafers or even anything else that you like. you just want to make sure that you’re using biscuits/cookies that are crispy so that they soften under the pudding but are still able to hold their shape.
tools:
-
pot or pan – i make the custard for this homemade banana pudding on the stove, so you’ll need a pot or pan for this
-
whisk – for mixing the custard while it’s cooking to ensure that it’s smooth and lump-free
-
a medium bowl – you’ll need a medium bowl for when you transfer the custard from the pot and place it in the fridge to cool
-
clingfilm or plastic wrap – to cover the custard while it cools so that it doesn’t develop a skin
-
large bowl – for whipping the cream. we’re going to be adding the custard to the whipped cream so make sure it’s large enough for both
-
hand or stand mixer – a hand or stand mixer will speed up the process when it comes to whipping the cream, but it’s not necessary. a whisk will do just fine if you don’t have access to a mixer but it will definitely take a little longer.
-
dish for your homemade banana pudding trifle – you can use any small or medium sized dish
step by step instructions
for full measurements, keep scrolling down to the recipe below.
step one: to a pot or pan, add sugar and cornstarch. whisk these together.
step two: separate the eggs. add the egg yolks to the sugar and cornstarch mixture, and add the egg whites to another bowl. use the egg whites for another dish.
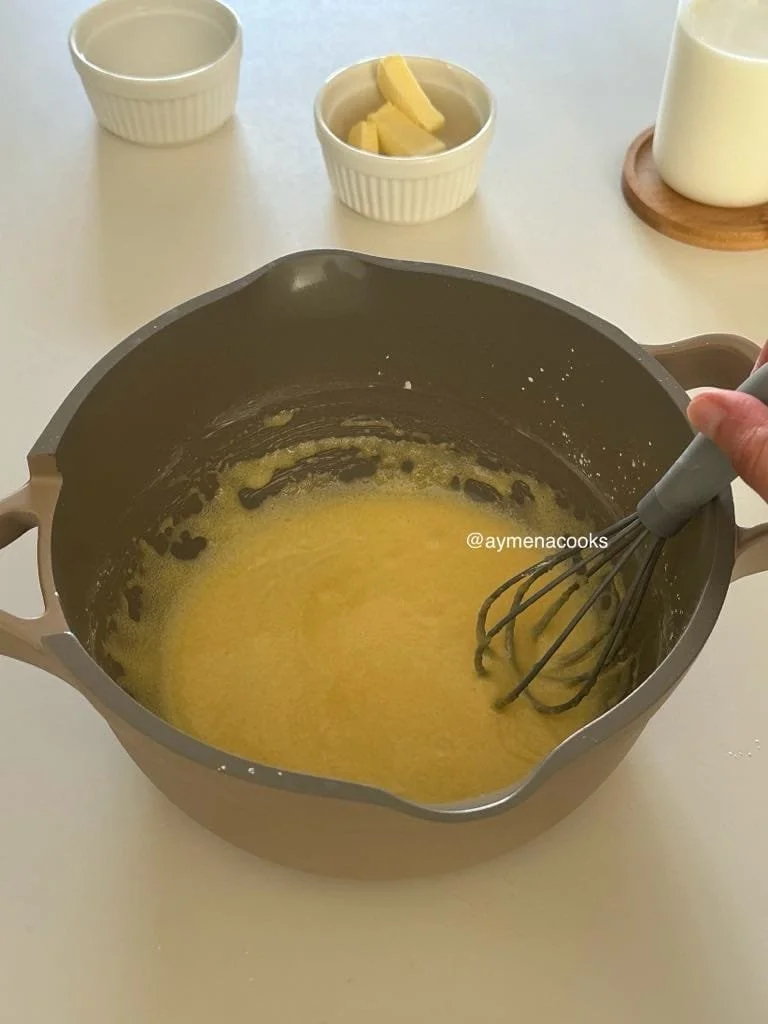
step three: whisk the sugar and cornstarch with the egg yolks until you get something that looks slightly thicker and is a pale, yellow colour.
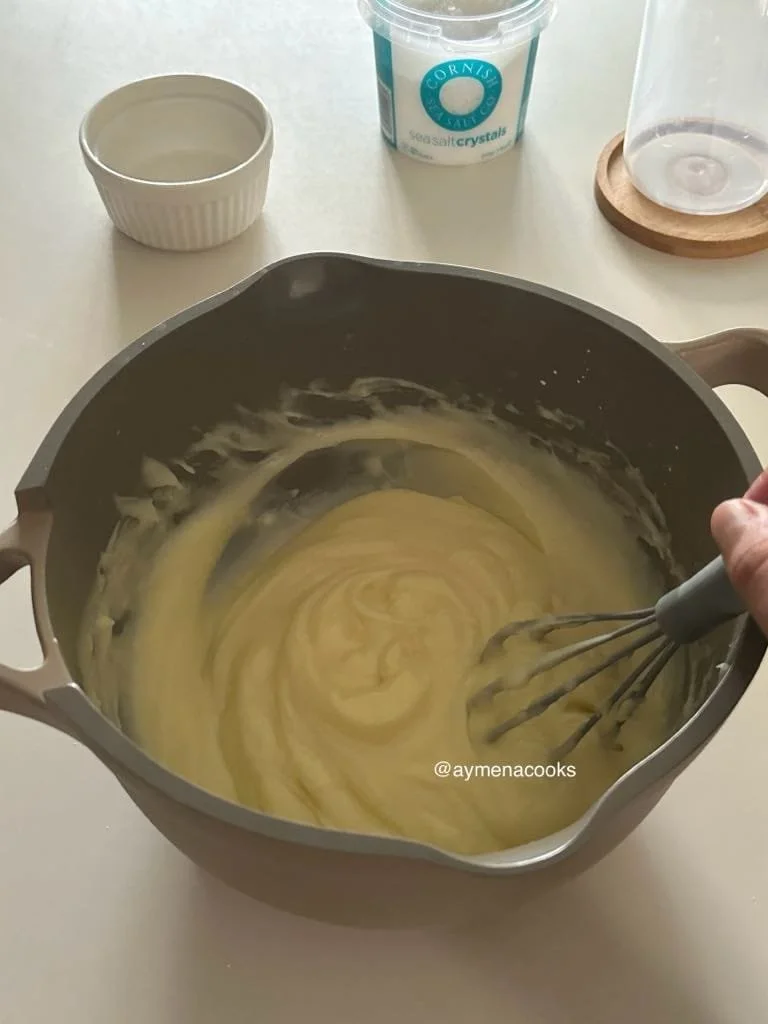
step four: pour the milk into the pot. heat up the pot over low-medium heat and keep stirring with the whisk as you cook the mixture.
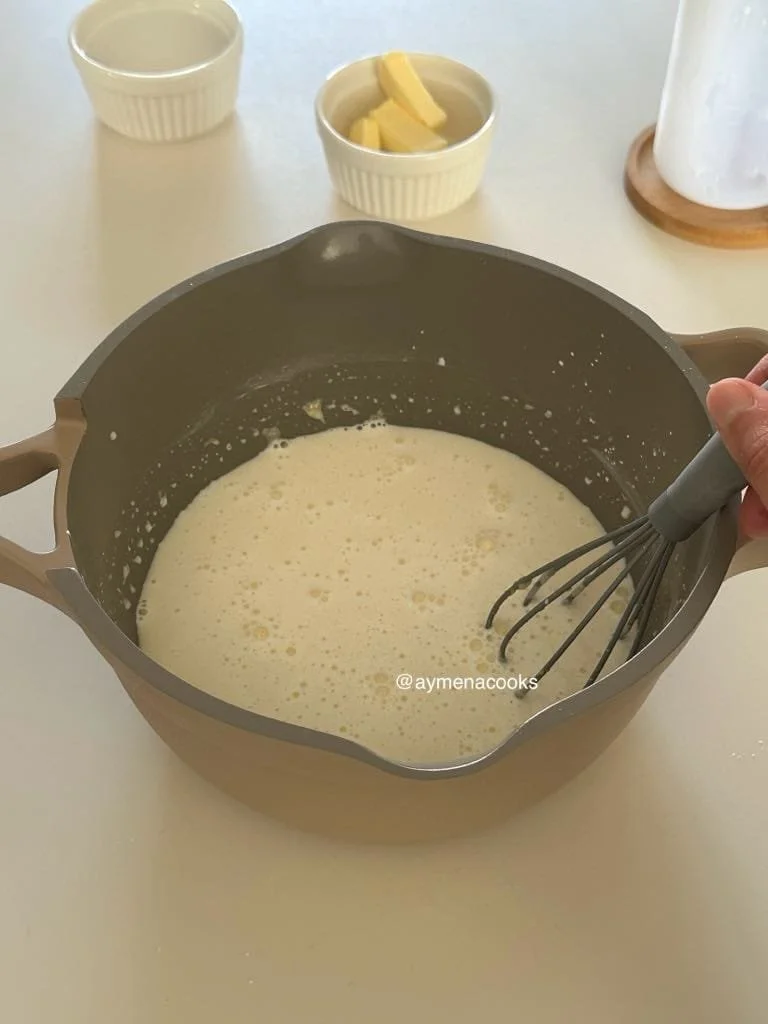
step five: continue to whisk and cook over low-medium heat until the mixture thickens up and looks smooth. this might take some time, so just be patient.
step six once the mixture thickens up, remove the pot from the heat and add butter, vanilla extract and a pinch of salt. whisk all of this into the custard until combined and the mixture looks smooth.
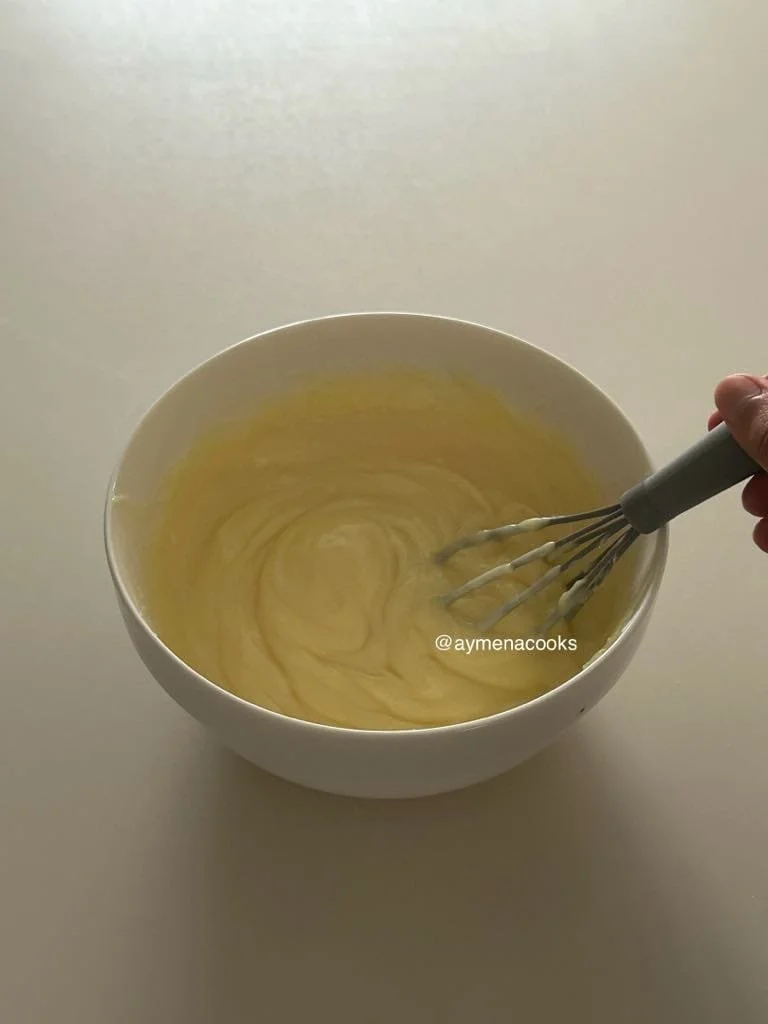
step seven: transfer the custard to another bowl. add condensed milk to the custard and whisk it in until combined.
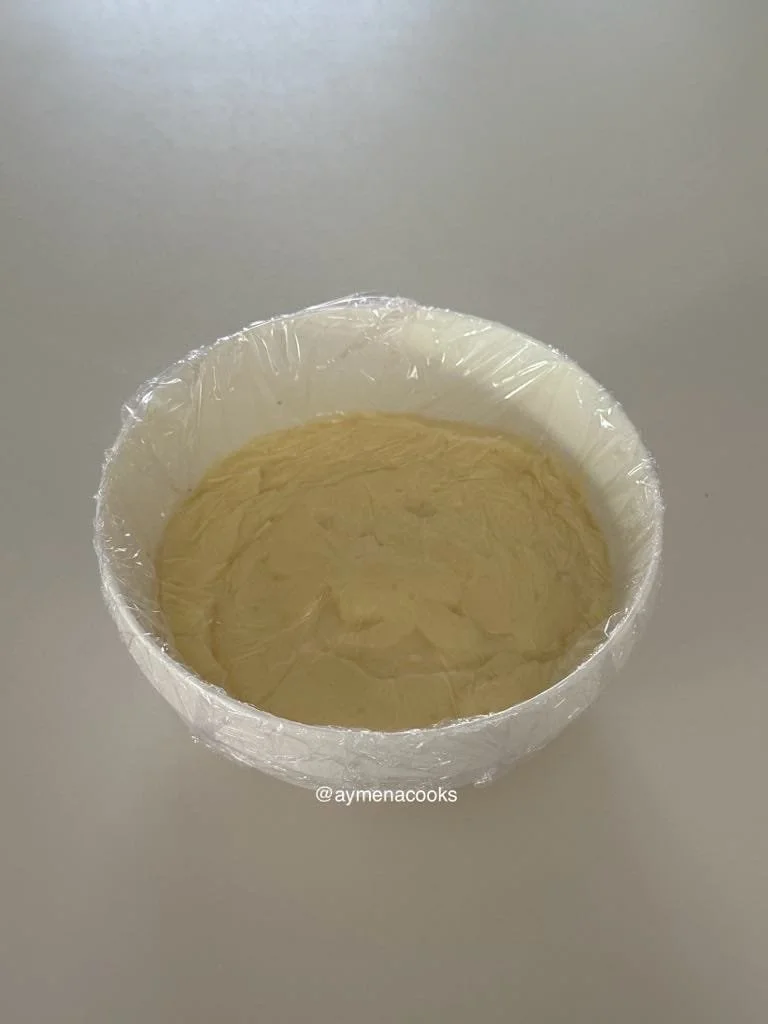
step eight: place clingfilm or plastic wrap on the custard, making sure it’s flat against the custard so that it doesn’t develop a skin.
step nine: place the custard in the fridge for about 45 minutes to an hour so that it can cool, set and thicken further.
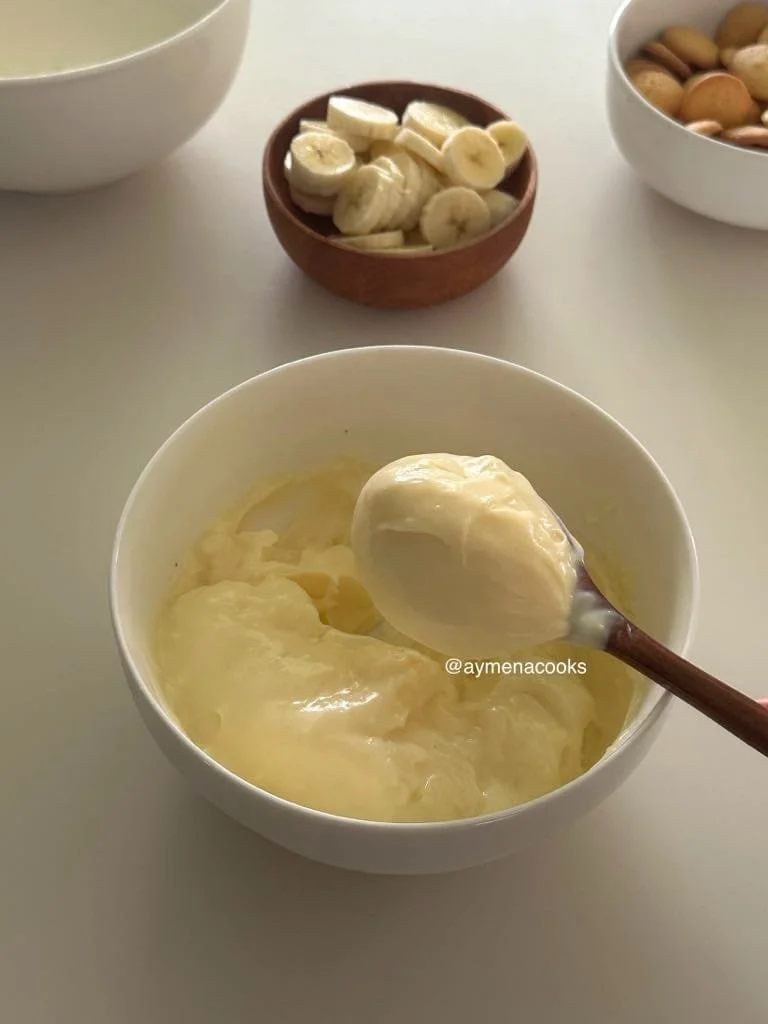
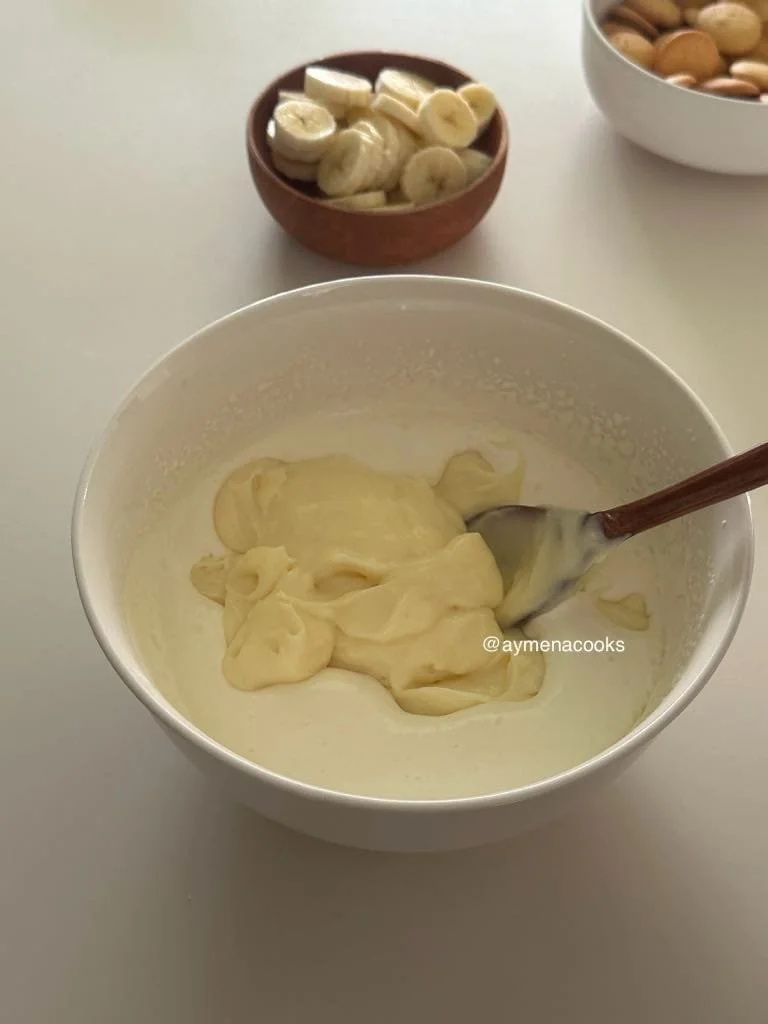
step ten: once the custard is cool, remove it from the fridge. when you first take it out, it will look thick and almost jelly-like. mix it up with a spoon and will be smooth.
step eleven: in a large bowl, add cold heavy cream, icing sugar or powdered sugar and some vanilla extract. whip this until the cream is thick and soft. if you want the banana pudding filling to be thicker, then whip the cream for longer.
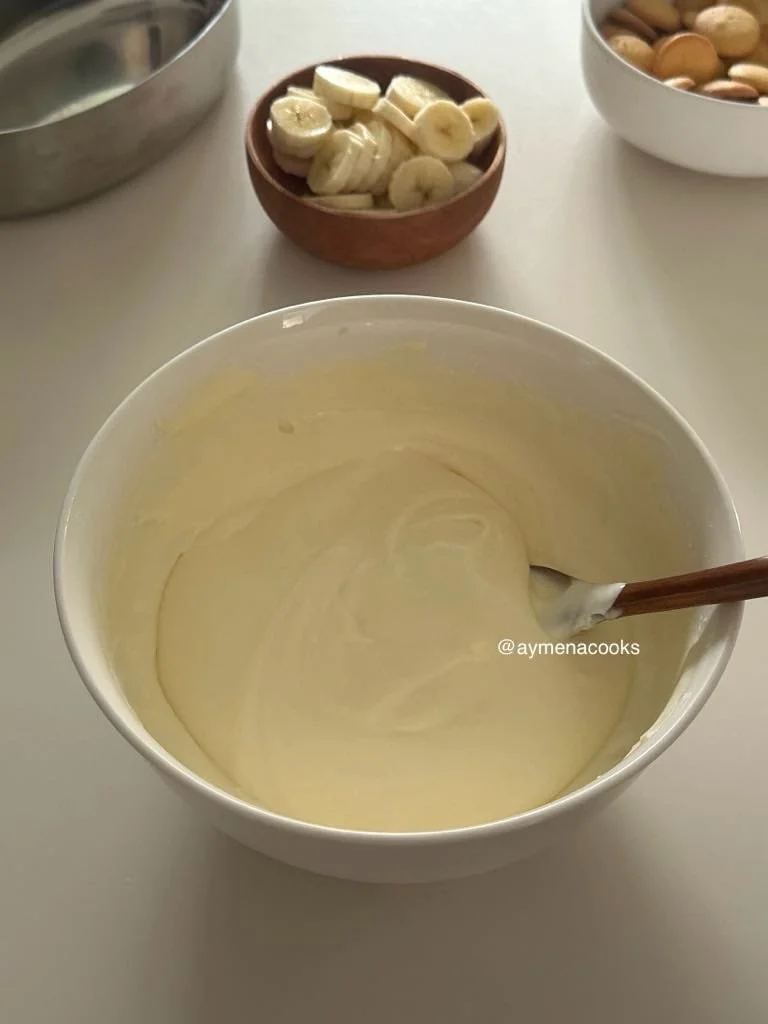
step twelve: add the cooled custard to the whipped cream, and use an electric mixer to beat the mixture until smooth and combined.
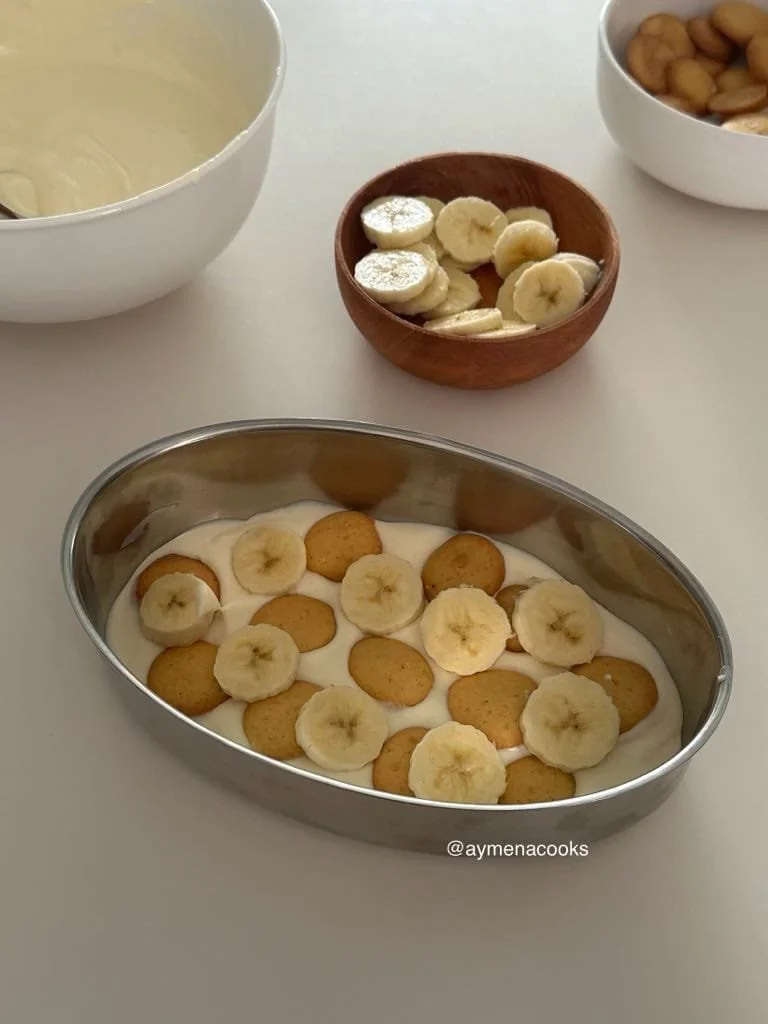
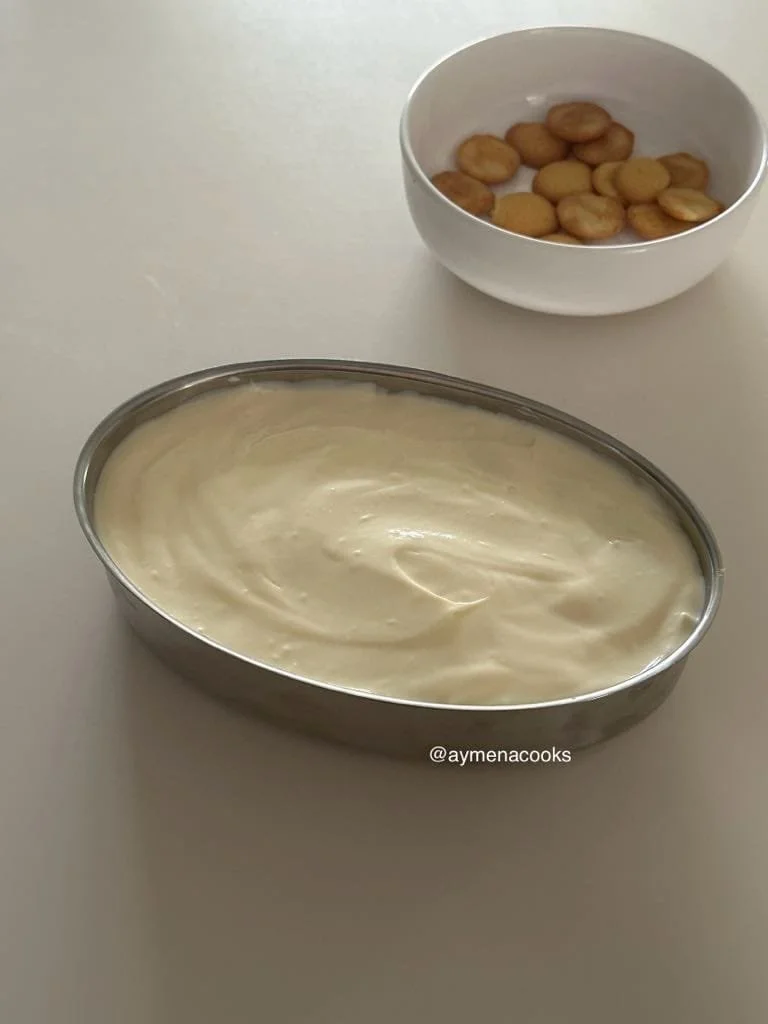
step thirteen: add a big dollop of the banana pudding cream to the base of your dish, and spread it out into an even layer.
step fourteen: add vanilla wafers and slices of banana on top of the cream layer.
step fifteen: add another layer of the cream on top of the vanilla wafers and banana slices and spread it out evenly.
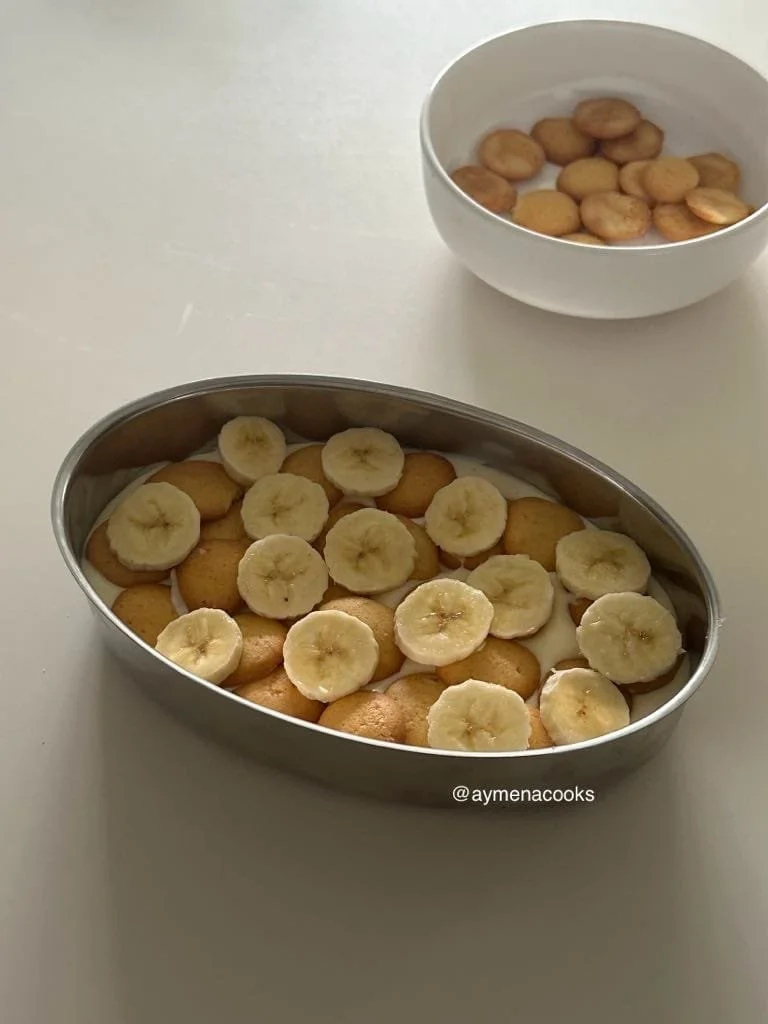
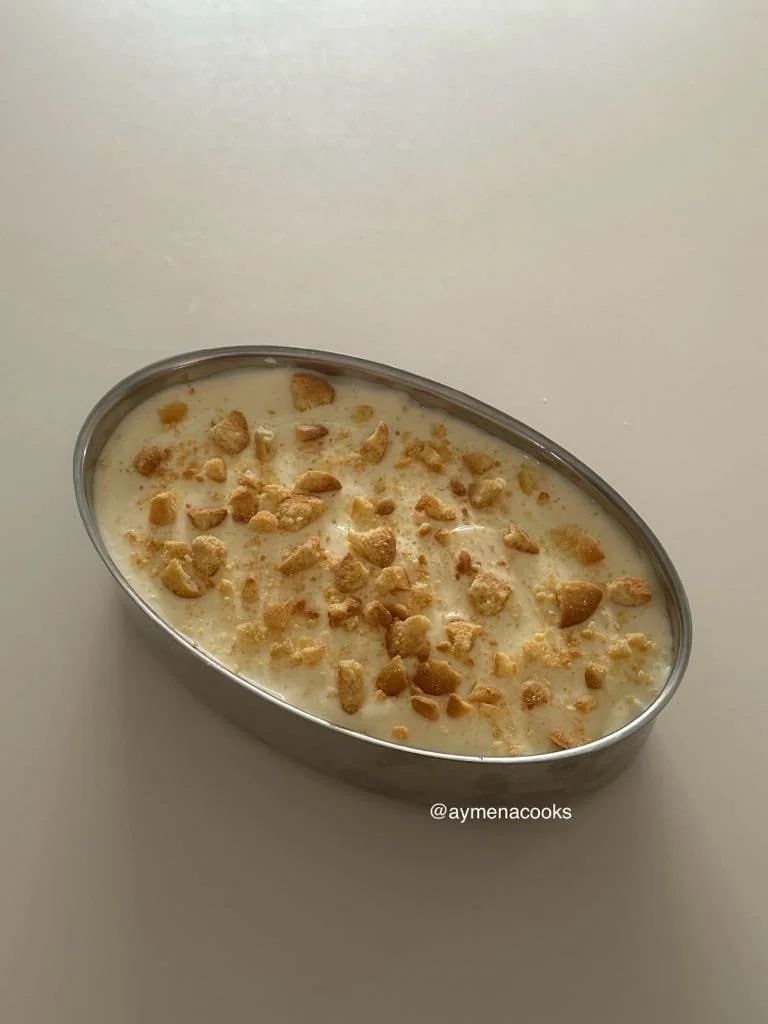
step sixteen: add another layer of the vanilla wafers and banana slices.
step seventeen: add the final layer of the banana pudding cream (there should be three layers of the cream in total, depending on the size of your dish) and spread it out into a thick and even layer so that it covers the wafers and banana slices.
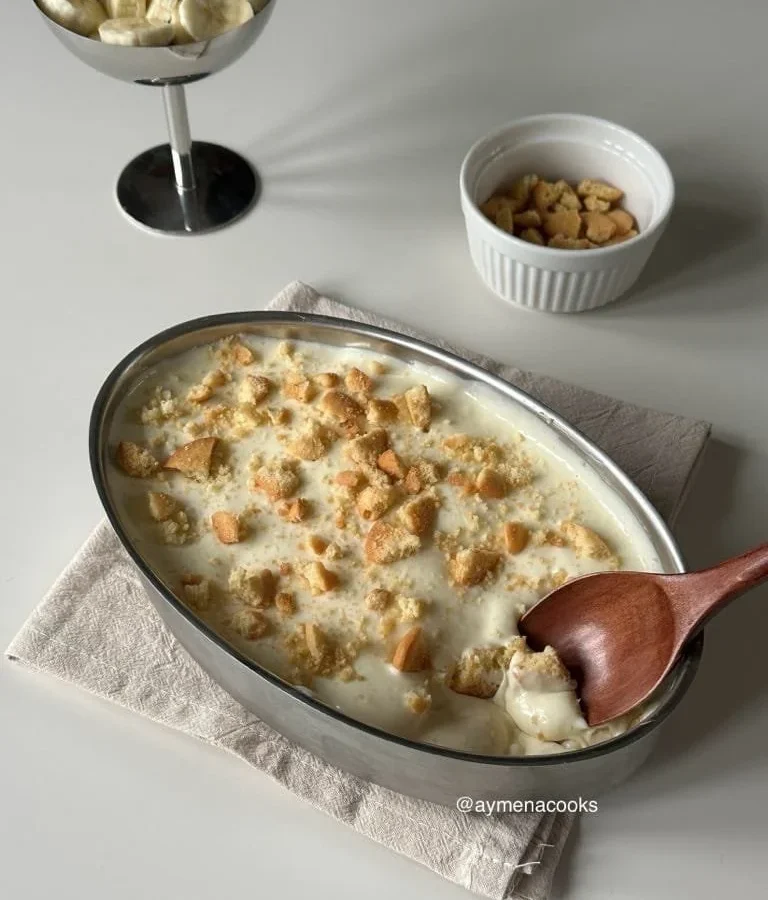
step eighteen: top with some crumbled up vanilla wafers, then cover the dish, and let it set in the fridge overnight.
step nineteen: the next day, remove from the fridge and let’s eat!
tips and notes
-
i highly recommend leaving this homemade banana pudding to set in the fridge for at least 6 hours, but preferably overnight so that the flavours meld together better, and the vanilla wafers soften properly. leaving it in the fridge for longer will also allow the cream to thicken up a little.
-
this homemade banana pudding can be stored in the fridge for three-four days.
-
when making the custard, cook the mixture over low-medium heat to prevent scrambling. it will take some time and will require some patience, so keep cooking over low-medium heat and don’t be tempted to turn the heat up to make the process go faster.
-
make sure to stir or whisk constantly while cooking the custard so that it’s smooth and lump-free.
-
before placing the custard in the fridge to cool, press plastic wrap or clingfilm directly on the surface of the custard to prevent a skin from forming on the top.
-
when whipping the cream, be careful not to over whip it or the mixture will look grainy. you want it to be soft, with a tip that curls over slightly when you lift the beaters out of the cream.
-
if you want a thicker banana pudding cream mixture, then feel free to whip the cream until it’s stiff. it will loosen up a bit when you mix it with the custard but will still be thicker than pictured here.
-
try to whip the cold custard into the whipped cream until smooth and just combined. do not over whip as this can make the cream grainy.
-
make sure to use cold double/heavy cream straight from the fridge otherwise it won’t whip well.
-
feel free to use store-bought vanilla wafers, or you can use a homemade banana pudding vanilla wafers recipe to make the vanilla wafers from scratch.
-
when it comes to making homemade banana pudding with bananas, you’ll want to use bananas that are yellow with minimal brown spots. bananas that are overly ripe will turn mushy under the cream, and bananas that are green will lack sweetness.
-
i would recommend keeping this homemade banana pudding refrigerated until you’re ready to serve.
-
i’d also recommend topping with some more crushed up vanilla wafers before serving for some crunch and texture.
frequently asked questions
-
can i make this homemade banana pudding without vanilla wafers ?
– absolutely! a classic banana pudding usually uses vanilla wafers but you can really use anything that you like. it’s best to use biscuits/cookies that are crisp so that they can soften under the cream but still hold their shape. you can make this homemade banana pudding with graham crackers or even something like digestives, biscoff, shortbread or ladyfingers. you can also make the vanilla wafers from scratch if you’re up to it! here’s an easy banana pudding vanilla wafers recipe.
-
do i have to make this homemade banana pudding with condensed milk ?
– i make this easy banana pudding using condensed milk but it’s definitely not absolutely necessary for the recipe. i like to make this Homemade banana pudding from scratch with condensed milk because the condensed milk adds a lovely sweetness and richness to the custard filling for the layers. if you don’t have condensed milk on hand, you can skip this, but you might need to add a bit more sugar to the cream in order to make up for the lack of sweetness from not using condensed milk.
-
can i make this homemade banana pudding without eggs ?
– you’ll need eggs to make the custard for the cream filling. however, if you’d like to avoid using eggs, you can make this homemade banana pudding with pudding mix or an instant custard mix or custard powder instead of making the custard from scratch.
-
can you make banana pudding with vanilla pudding mix ?
– i prefer to make the custard from scratch, but if you want to keep this homemade banana pudding easy and quick, you can definitely just use a vanilla pudding mix instead of making the custard.
-
do i have to make this homemade banana pudding recipe with cornstarch ?
– cornstarch is quite important for this homemade banana pudding recipe as it helps thicken up the custard for the cream filling.
-
do i have to make this homemade banana pudding with heavy whipping cream ?
– double cream or heavy cream is quite important for this homemade banana pudding recipe. we’re going to whip it and mix it into the custard – this will give us that light and airy filling. however, it’s not completely necessary, especially if you want more of an old fashioned banana pudding – this typically does not use heavy whipping cream and just layers the custard on its own with the banana slices and vanilla wafers.
-
is this homemade banana pudding no bake ?
– yes, this homemade banana pudding is a completely no bake dessert, which is perfect for when you don’t feel like turning the oven on! however, if you want to make the vanilla wafers from scratch, you will need to bake these. if you also want to add a common homemade banana pudding topping like meringue, you will also need to bake this at the end.
-
my custard has lumps – what do i do ?
– if you notice lumps forming in your custard, remove from the heat and strain the custard through a fine mesh sieve. to prevent lumps, be sure to cook the custard over low-medium heat and stir constantly as you cook it.
-
how do i go about making banana pudding ahead of time ?
– when it comes to making banana pudding in advance, you can make it around 1-2 days ahead of time. it needs an overnight rest anyway, and actually improves with time as the flavours meld together and the vanilla wafers soften under the cream.
-
how long is homemade banana pudding good for ?
– this homemade banana pudding should be good in the fridge for about 3-4 days. after this point, the bananas may darken and the vanilla wafers will become overly soft.
-
can you freeze homemade banana pudding ?
– this homemade banana pudding doesn’t really freeze well due to the custard and fresh bananas. the texture will change significantly after thawing.
-
does homemade banana pudding have to be refrigerated ?
– yes, this homemade banana pudding needs to set in the fridge overnight so that the wafers can soften and the cream can thicken up a little. you also need to store any leftover banana pudding in the fridge.
-
do i have to make homemade banana pudding with real bananas ?
– fresh banana slices are typically added to the layers in a banana pudding. however, you really don’t need to add bananas if you don’t want to. if you would still like some of that banana flavour but not actual banana slices, you could use a banana flavoured pudding mix instead of vanilla pudding or even make a banana custard instead.
recipe
homemade banana pudding
this homemade banana pudding is made entirely from scratch with a silky homemade custard folded through freshly whipped cream and sandwiched between layers of perfectly ripe banana slices and crisp vanilla wafers.
- 20 minsprep
- 10 minscook
- 4servings
ingredients
13 ingredients- 75g granulated sugar (1/4 cup + 2 tbsps)
- 27g cornflour or cornstarch (3 tbsps + 2 tsps)
- 3 large egg yolks
- 300ml whole or full fat milk (1 cup + 1/4 cup)
- 27g butter, unsalted (2 tbsps)
- 1 tsp vanilla extract, for the custard
- a pinch of salt
- 150g sweetened condensed milk (about 1/2 cup)
- 150ml double cream or heavy cream (1/2 cup + 2 tbsps)
- 12g icing sugar or powdered sugar (1 tbsp + 1 tsp)
- 1/4 tsp vanilla extract, for the cream
- 45-50 vanilla wafers (depending on your serving dish)
- 2 bananas, peeled and sliced
method
18 steps- to a pot or pan, add the sugar and cornstarch. whisk these together.
- separate the eggs. add the egg yolks to the sugar and cornstarch mixture, and add the egg whites to another bowl. use the egg whites for another dish.
- whisk the sugar and cornstarch with the egg yolks until you get something that looks slightly thicker and is a pale, yellow colour.
- pour the milk into the pot. heat up the pot over low-medium heat and keep stirring as you cook the mixture. continue to do this until the mixture thickens up and looks smooth. this might take some time, so just be patient. do not turn up the heat.
- once the mixture thickens up, remove the pot from the heat and add butter, vanilla extract and a pinch of salt to the custard. mix all of this into the custard until combined and the mixture looks smooth.
- transfer the custard to another bowl. add condensed milk to the custard and whisk it in until combined.
- place clingfilm or plastic wrap on the custard, making sure it's flat against the surface of the custard so that the custard doesn't develop a skin.
- place the custard in the fridge for about 45 minutes to an hour so that it can cool, set and thicken further.
- once the custard is cool, remove it from the fridge. when you first take it out, it will look thick and almost jelly-like. mix it up with a spoon and it will be smooth.
- in a large bowl, add cold heavy cream, icing sugar or powdered sugar and some vanilla extract. whip this until the cream is thick and soft. if you want the banana pudding filling to be thicker, then whip the cream for longer.
- add the cooled custard to the whipped cream, and use an electric mixer to beat the mixture until smooth and combined. do not over whip. the cream should look thick and smooth.
- add a big dollop of the banana pudding cream to the base of a dish, and spread it out into an even layer.
- add vanilla wafers and slices of banana on top of the cream layer.
- add another layer of the cream on top of the vanilla wafers and banana slices and spread it out evenly.
- add another layer of the vanilla wafers and banana slices.
- add the final layer of the banana pudding cream (there should be three layers of the cream in total, depending on the size of your dish) and spread it out into a thick and even layer so that it covers the wafers and banana slices.
- top with some crumbled up vanilla wafers, then cover the dish, and let it set in the fridge overnight.
- the next day, remove from the fridge, top with some more crumbled up vanilla wafers and let's eat!
comments
Questions, tips, and kind notes are welcome.